
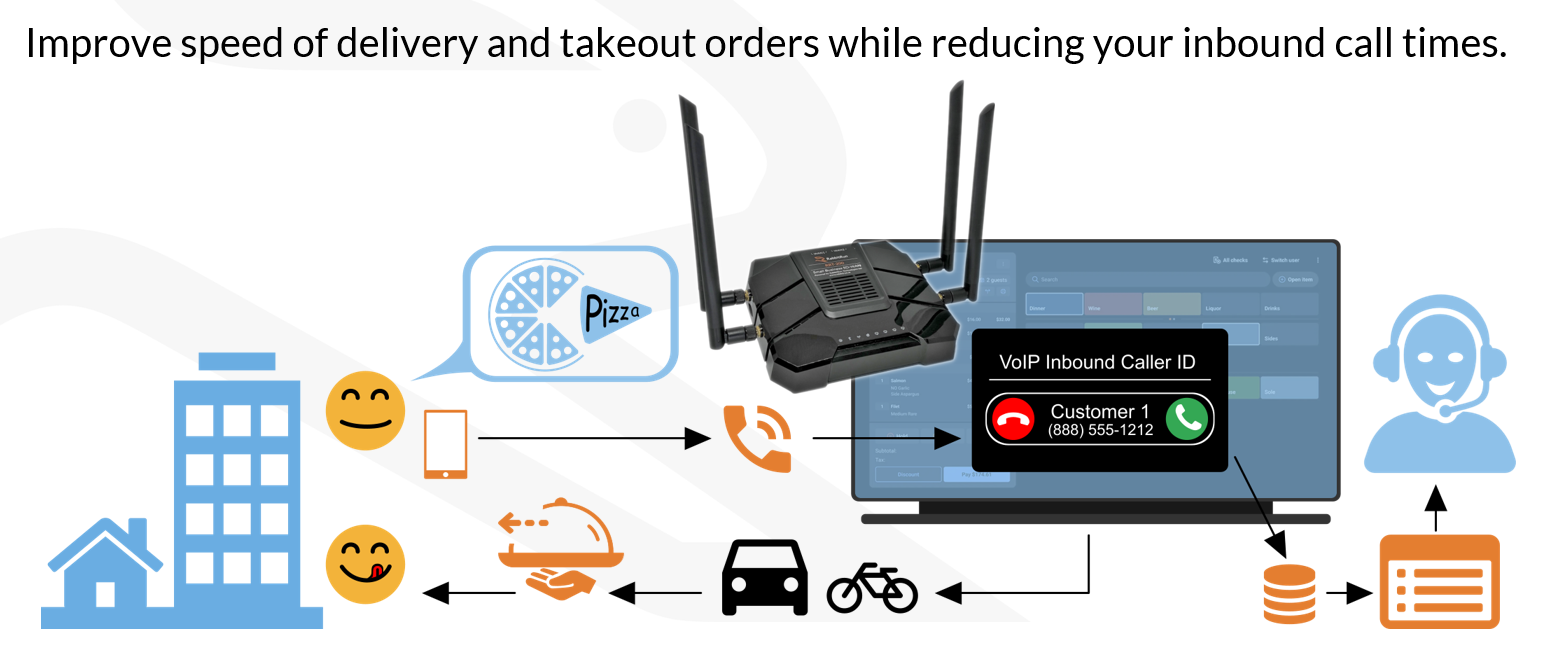
- RabbitRun makes SIP Caller ID Feature built-in and eliminates the need for 3rd Party Caller ID Equipments and Costs!
- How do we enable the SIP Caller IP Feature?
Note: SIPCID cannot be enabled without the SIPCID addon License. To avail of the SIPCID, please send a support email to support@rabbit.run requesting for the SIPCID license (exisiting device) or include the SIPCID addon upon ordering of the device (new orders). SIPCID is available for 4, 6, 10 and 20 simultaneous CID.
- Setting up SIPWATCH for Phones on P1.
Note: It is necessary that the VoIP Phones are on a different LAN. With RabbitRun, we separate the Phones on LAN1 having its own subnet.
- Once SIPCID License is applied to the device, navigate to SDWAN > SIPWATCH > CONFIG
- Click on the ENABLE SIPWATCH box.
- Change DELAY START UP to 120.
- In the INTERFACE section, select the Port towards the Phones (preferred Phones are plugged into P1 – in this case select EHTERNET PORT P1)
- Select SIP Ports in PORT RANGE (default is 5060-5061).
- Hit on SAVE & APPLY at the bottom of the page to apply the changes done.

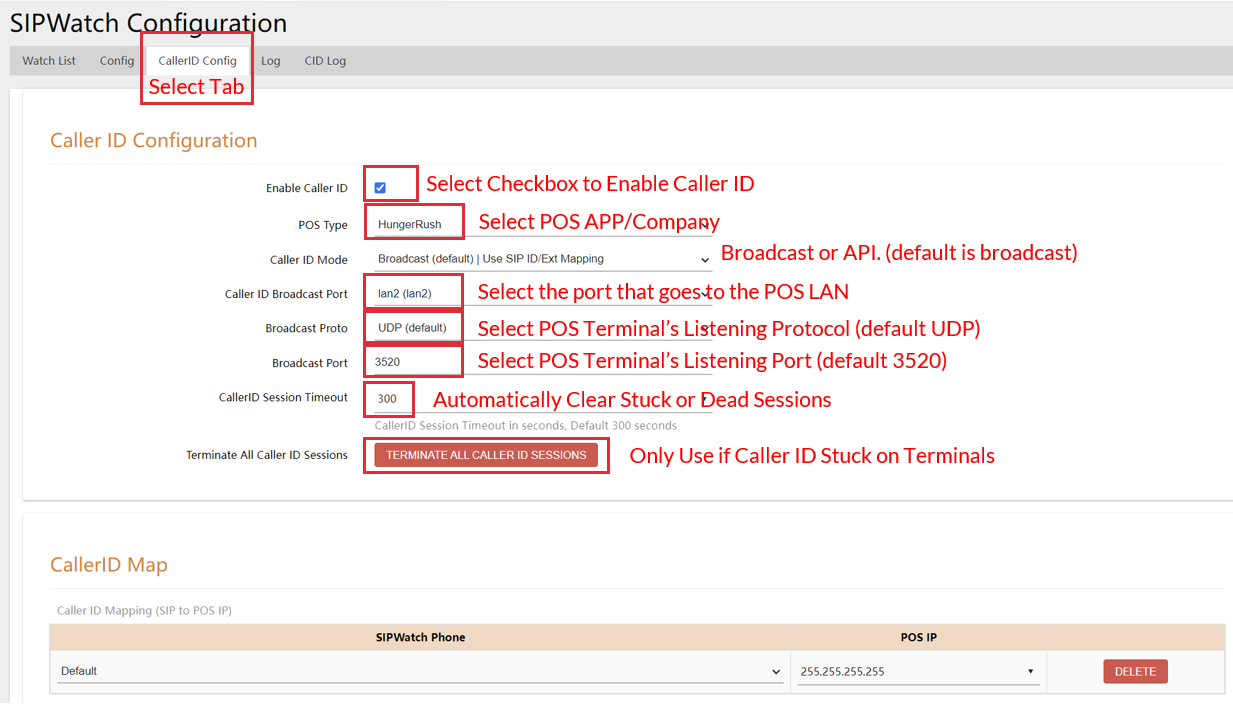
- SIP Caller ID Setup
- Navigate to CALLERID CONFIG tab.
- Click on the ENABLE CALLER ID box.
- Under POS TYPE, select the POS APP/Company of the site.
- Select the port that goes to the POS LAN.
- IF NO FIREWALL BEFORE POS DEVICES
- Select LAN2 for the BROADCAST PORT.
- IF A FIREWALL IS INSTALLED BEFORE THE POS DEVICES
- Select LAN3 as the BROADCAST PORT
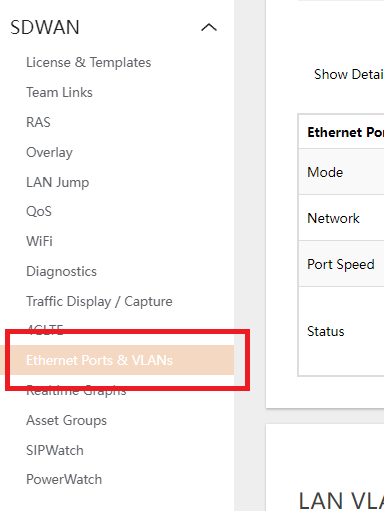
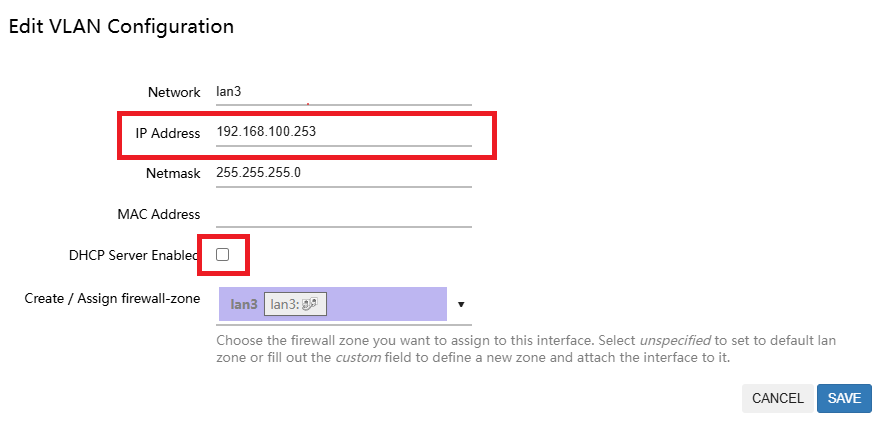
- Disable DHCP Server of LAN3 under SDWAN > ETHERNET PORTS AND VLANS.
- Assign P3 an IP from the Subnet of the Firewall (Ex.192.168.100.253 if Firewall subnet us 192.168.100.XXX).
- Connect P3 to the Firewall LAN after setting up the Caller ID.
- IF NO FIREWALL BEFORE POS DEVICES
- Select the POS Terminal’s listening Protocol (default is UDP)
- Select the POS Terminal’s listening Port (default 3520)
- Hit SAVE & APPLY at the bottom of the page.
- Caller ID Integration should now be enabled.